Hi
I'm just about to embark on laying 30sqm of the G603 Silver granite.
I've laid a good 15cm sub base and compacted and ready to crack on with slabbing.
Info on here has been invaluable - I presumed I would just lay onto sand and be done with it but now I am better informed I know that I need to use cement mix - I am going to go for a 1:10 dry mix as I understand this naturally will absorb moisture and harden of its own accord.
So my question is - with regards to 'priming' the granite I know understand I need to make a bonding mix with just SBR I can get from Screwfix plus OPC.
Can I coat a whole bunch of slabs at once [say a 20+ or so] and then lay these...I know the slurry quickly dries..so I do a have to continually mix more and coat whilst I'm laying slabs?
Is the purpose of the slurry to adhere to the laying bed of dry mortar - or is it to provide a shield to liquids rising from the underside.
Thanks for your help - I'll take some photos and post on here as it progresses!
Slurry / laying - silver granite
-
Tony McC
- Site Admin
- Posts: 8346
- Joined: Mon Jul 05, 2004 7:27 pm
- Location: Warrington, People's Republic of South Lancashire
- Contact:
Nope: the slurry primer bond bridge needs to be freshly applied, within 2-3 minutes of being laid. You cannot batch process a whole load of flags in advance.
The SBR accelerates the setting process once exposed to air, so the working life of a primer in thin applications is pretty limited. If you make up a batch of primer beforehand and keep it in a bucket or similar, it will remain workable for a good or hour or so, but once it's applied as a thin film to the underside of a flag, it goes off damned quickly!
The SBR accelerates the setting process once exposed to air, so the working life of a primer in thin applications is pretty limited. If you make up a batch of primer beforehand and keep it in a bucket or similar, it will remain workable for a good or hour or so, but once it's applied as a thin film to the underside of a flag, it goes off damned quickly!
Site Agent - Pavingexpert
-
GavP
- Posts: 7
- Joined: Tue May 14, 2019 6:44 pm
- Location: Peteroborough
Hi
Finally got the last slab down. Luckily I over ordered and about 3-4 were broken either in transit or during the build.
These are very brittle, I accidentally knocked a corner of one when moving and the hole slab shattered.
I experimented with a wet mix, completely dry - but found the best option to level the mortar was to initially level with a spot in each corner and then fil in the rest of the base area once the corners were perfect.
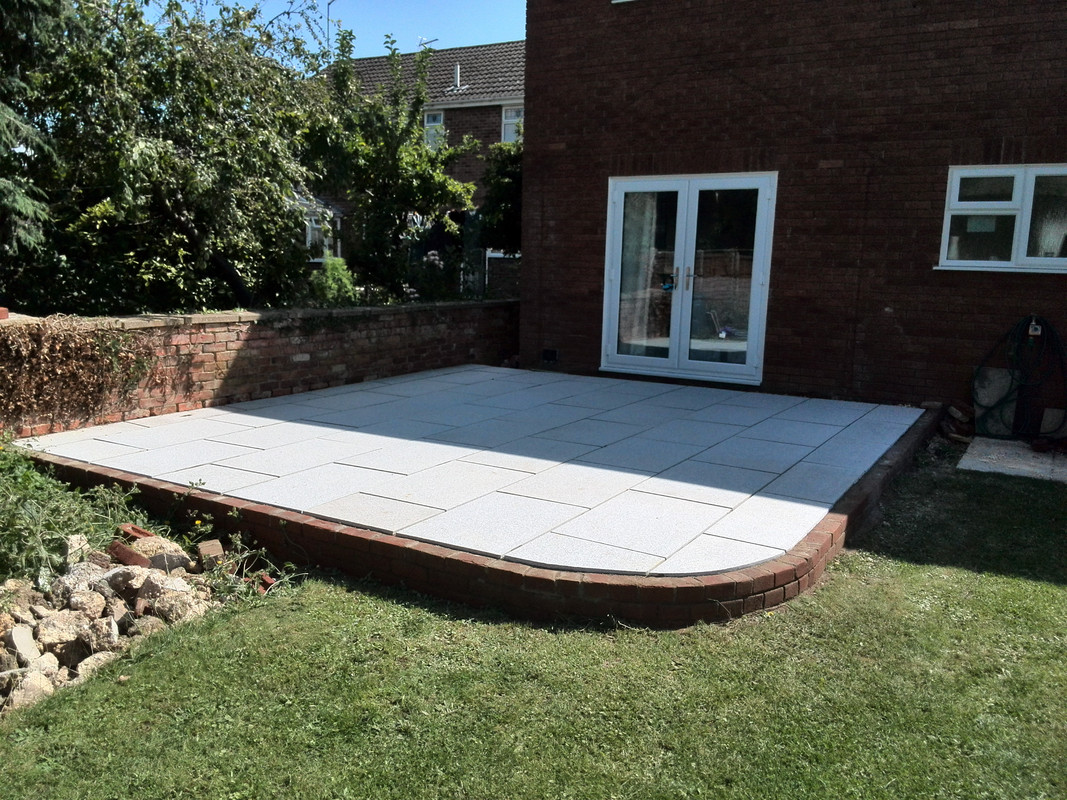
Also had to cut a few curved edges to match with my rounded wall - this wasn't too hard with the disc cutter as the slabs are only about 25mm thick - but I imagine its more difficult to cut 40mm slabs into fancy shapes. If anyone else has to do this, best option is to make a paper template of the desired size first and then use that.
I have noticed a few marks that appear toi be rust spots have appeared...I guess this is most likely small spots of iron in the granite...they can be washed off so I'm hoping sealing will prevent them once that job is done.
Finally got the last slab down. Luckily I over ordered and about 3-4 were broken either in transit or during the build.
These are very brittle, I accidentally knocked a corner of one when moving and the hole slab shattered.
I experimented with a wet mix, completely dry - but found the best option to level the mortar was to initially level with a spot in each corner and then fil in the rest of the base area once the corners were perfect.
Also had to cut a few curved edges to match with my rounded wall - this wasn't too hard with the disc cutter as the slabs are only about 25mm thick - but I imagine its more difficult to cut 40mm slabs into fancy shapes. If anyone else has to do this, best option is to make a paper template of the desired size first and then use that.
I have noticed a few marks that appear toi be rust spots have appeared...I guess this is most likely small spots of iron in the granite...they can be washed off so I'm hoping sealing will prevent them once that job is done.
-
Tony McC
- Site Admin
- Posts: 8346
- Joined: Mon Jul 05, 2004 7:27 pm
- Location: Warrington, People's Republic of South Lancashire
- Contact:
GavP wrote:I experimented with a wet mix, completely dry - but found the best option to level the mortar was to initially level with a spot in each corner and then fil in the rest of the base area once the corners were perfect.
While this may have worked for you on this occasion, it's not a method that I would ever encourage. It's essentially a variation on spot bedding and there's massive potential for the "infill" not to provide the critical full support required from a laying course.
Other than that, though, a great looking job.
Site Agent - Pavingexpert